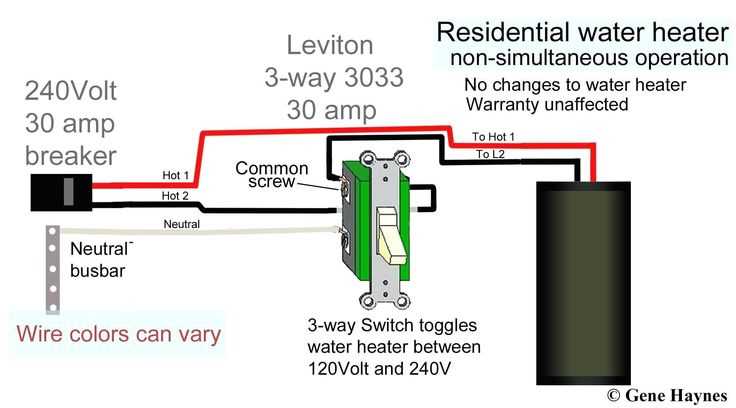
Connect power lines directly to a dedicated double-pole breaker to ensure stable voltage delivery. Verify that the line voltage matches the unit rating before making any connections to prevent overloads.
Use properly rated conductors and terminals for all connections. Maintain consistent wire color codes for live, neutral, and ground to simplify identification and reduce the risk of incorrect installation.
Position the control thermostat near the center of the room for accurate temperature regulation. Ensure all sensor leads are secured without tension or sharp bends that could damage insulation over time.
Test each connection with a multimeter before energizing the system. Check continuity, voltage, and proper polarity to confirm safe operation and avoid potential shorts or overheating during use.
Connecting 240 Volt Room Heating Units
Run each line from a dedicated double-pole breaker to provide consistent voltage and prevent overloads. Ensure that the incoming cables are rated for the load, and maintain proper spacing between hot, neutral, and ground conductors to reduce heat buildup.
Follow these steps for safe installation:
- Mount the unit on a stable wall surface with clearance from combustible materials.
- Connect the two live wires to the breaker terminals, observing polarity.
- Attach the ground wire to the designated grounding point.
- Install the control thermostat and secure sensor leads without tension or sharp bends.
- Test each connection with a multimeter to confirm continuity and correct voltage before energizing the system.
Regular inspection and proper labeling of all lines help maintain safe operation. Document the placement of each conductor and control for future troubleshooting or expansion to ensure consistent performance over time.
Connecting Power Supply and Breaker Lines
Run a dedicated double-pole breaker line from the main panel to the unit’s location to provide stable voltage. Ensure the breaker rating matches the load requirements and that all conductors are sized according to amperage specifications.
Strip the insulation carefully from each conductor without nicking the metal to maintain full conductivity. Insert wires securely into the breaker terminals and tighten screws to the manufacturer’s torque specifications to avoid loose connections.
Maintain proper separation between live and neutral lines throughout the run. Route conductors in parallel without crossing over or sharing conduits with low-voltage lines to reduce electromagnetic interference and heat accumulation.
Install a junction box if the line needs to branch to multiple units. Use wire nuts or rated terminal blocks to connect branches, and ensure each conductor is fully seated with no exposed metal beyond the connector.
Verify all connections before energizing using a multimeter to check continuity and correct voltage across terminals. Confirm that the grounding conductor is firmly attached to the designated point in both the breaker panel and the unit.
Label each conductor and breaker position for future maintenance or troubleshooting. Clear documentation of line routing and connection points ensures safe adjustments and prevents accidental misconnection during upgrades or repairs.