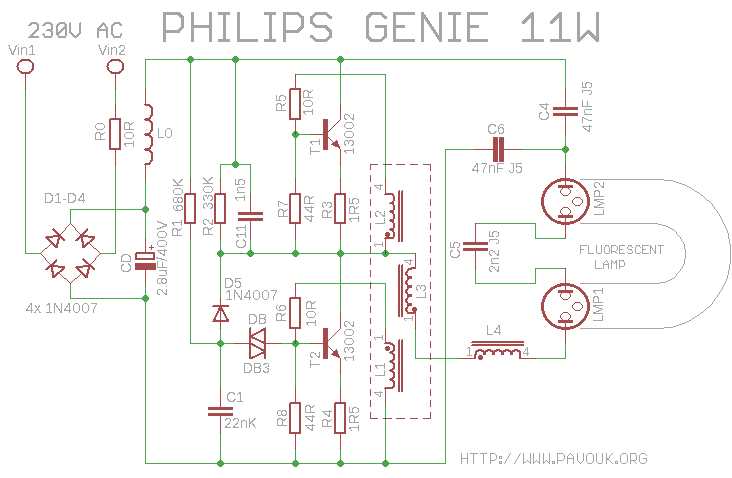
Connect the starter and ballast correctly to prevent flickering and extend operational lifespan. Use color-coded conductors: live (brown or black), neutral (blue), and ensure secure grounding with a green/yellow wire. Loose contacts increase resistance and can trigger overheating.
Observe polarity alignment on pin terminals when installing the lamp. Incorrect insertion can reduce brightness and strain internal components. Verify continuity with a multimeter before powering the circuit.
Install protective fuses or circuit breakers rated between 1A–3A depending on total load. Overcurrent prevention minimizes risk of damage to electronic starters and ballasts, especially in long fixture runs.
Consider fixture spacing and wiring length to avoid voltage drop. Maintain a maximum conductor length of 10 meters for standard single-lamp setups. Excessive distance can cause dim illumination and early component wear.
Secure all connections inside terminal blocks or junction boxes to prevent accidental contact. Use insulated sleeves for exposed ends. Proper mechanical support reduces vibration stress and maintains stable operation over time.
Electrical Connection Setup for a Fluorescent Fixture
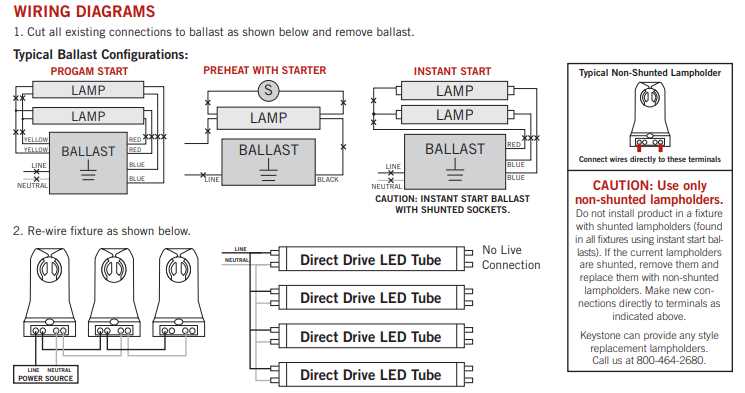
Connect the live wire directly to one terminal of the starter; the neutral conductor should attach to the opposite end of the ballast. This arrangement ensures the initial surge properly ionizes the gas inside the lamp.
Insert the lamp into the holder pins so that the electrodes align with the internal contacts. Secure the fixture to prevent any movement that might disrupt electrical continuity.
For dual-lamp configurations, parallel the ballasts while keeping each starter separate. This method balances current flow and reduces flickering during ignition.
Ensure the choke is rated at the correct voltage–typically 120V or 230V depending on the supply. A mismatched component can lead to premature failure or overheating.
Install a protective cover over exposed terminals. Use insulating caps to prevent accidental short circuits and reduce the risk of electric shock during maintenance.
After connecting all components, test the setup with a multimeter to verify voltage across the electrodes. Any deviation from expected readings indicates a loose connection or faulty part.
Replace any worn-out starters promptly. Even if the lamp lights up, a degraded starter can cause intermittent flickering and reduce the overall lifespan of the fixture.
Connecting the Ballast and Starter Correctly
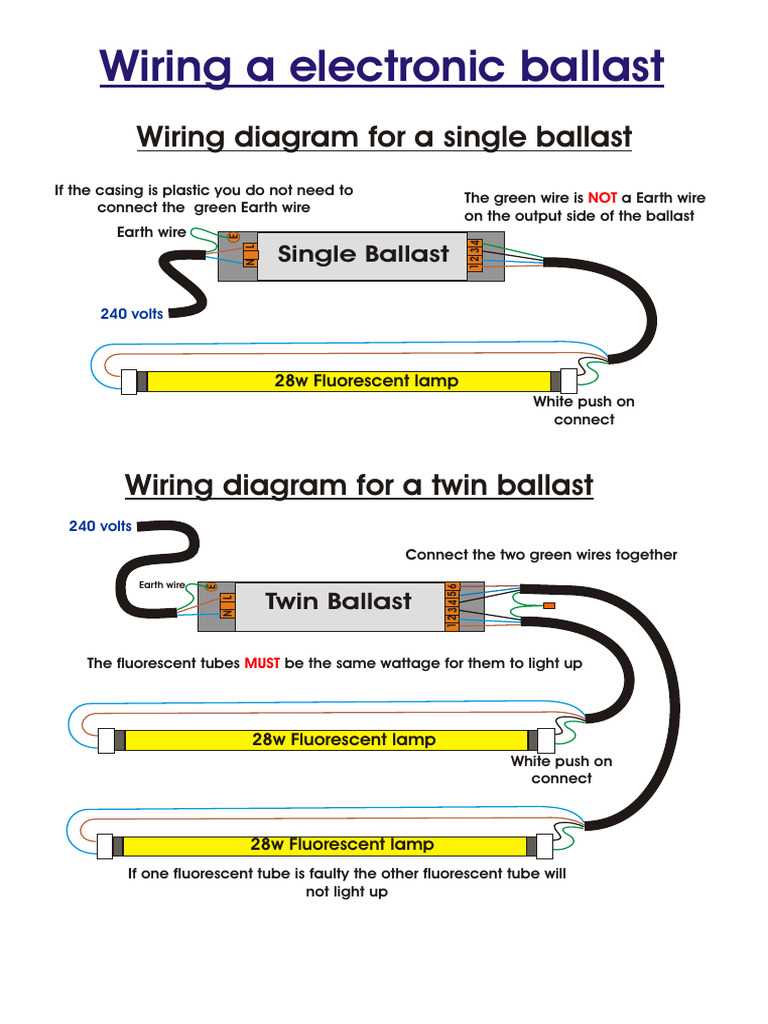
Ensure the ballast is rated for the tube’s voltage and current before installation; mismatched ratings can cause flickering or overheating.
Identify the starter type–neon or electronic–and confirm compatibility with your ballast. Incompatible starters may prevent the tube from igniting.
- Connect the live wire to one terminal of the ballast.
- Attach the neutral wire to the other terminal of the ballast.
- Link one side of the starter to the ballast output.
- Connect the other side of the starter to the tube socket nearest to it.
Check that all connections are tight; loose contacts increase resistance, generate heat, and can reduce tube lifespan.
For tubes longer than 36 inches, install the ballast as close to the tube as possible to minimize voltage drop.
- Insert the starter into its socket with a gentle push, ensuring the pins are fully seated.
- Double-check polarity if using a magnetic ballast, as reversing the connections can prevent ignition.
After securing all terminals, switch on the mains and observe the tube. If the starter glows but the tube fails to light, recheck the connections between the ballast and starter.
Routine inspection: clean dust from both ballast and starter sockets; accumulation can cause poor contact and intermittent operation.